
Expert advice for a flawless bake
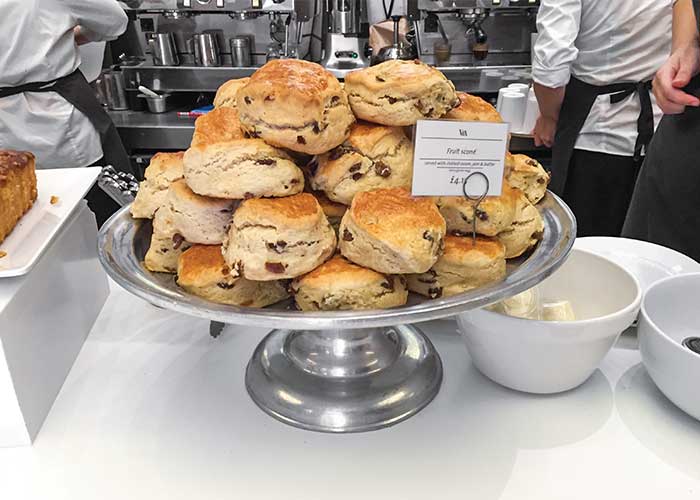
Scones are almost as synonymous with afternoon tea as the beverage itself. The toothsome and traditional teatime staple comes in many different sizes, shapes, and flavors, but one thing remains the same: the methods to create the ultimate scone are similar. To mark TeaTime’s 20th anniversary, our go-to professionals— our editor, recipe developers and food stylists in our test kitchen, and our London-based contributing editor, Jane Pettigrew—share their best practices for preparing a scrumptious and photo-worthy scone. Here are their tips for perfecting the art of the delightful bake.
Proper Ingredients
Before beginning, it is best to prepare all the ingredients ahead of time to ensure that everything is ready and easily accessible. Pay careful attention to the types of ingredients the recipe calls for. “The butter and cream must be very cold to make a tender, flaky scone,” food stylist Kathleen Kanen says. Additionally, it is extremely important to measure the flour correctly and prepare the butter according to the recipe’s instructions. “Flour should be measured by the spoon-and-level method rather than dipping the measuring cup into the container,” contributing editor Jane Pettigrew states. “The flour should be whisked or stirred in the container then spooned into the measuring cup and leveled off with a straight edge. When preparing your butter, cut it into small pieces so that it rubs more easily into the flour.”
Mixing & Kneading
Most of the magic in the scone-making process happens in the mixing of the dough. TeaTime’s contributing recipe developer Janet Lambert prefers her scone dough to be quite firm and advises, “Don’t add too much extra cream [or other liquid] to get the dough to come together, or the scones will flatten, rather than rise, when they bake.” Jane Pettigrew remarks, “When mixing the dough, it should come together in a soft, sticky mass—not too wet and not too dry.”
The key is to knead softly and precisely without over-working the dough. “Use a gentle hand when kneading and rolling out the dough to prevent tough scones,” Janet suggests, recommending a patting-and-folding motion instead of the type of kneading associated with yeasted breads.

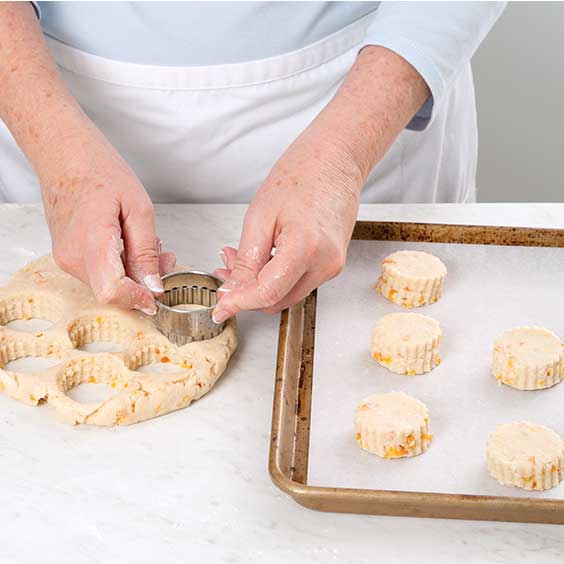
Cutting & Baking
The third or fourth step of many of our recipes instructs readers to use a cutter dipped in flour and to cut as many scones as possible from the dough without twisting the cutter, rerolling scraps as necessary or only a certain number of times. “Rerolling scraps can be daunting, and usually, they don’t ever turn out as well as your first roll,” food stylist Katie Moon Dickerson explains. “Laminate scraps by stacking them on top of each other and patting them into the recommended thickness per the recipe. This makes them turn out so much better than balling up all your scraps and rerolling.” When lifting each scone out of the cutter, Jane recommends flipping it over to give each scone a nice, flat surface with a sharp edge.
“I like to freeze my scones for at least 15 to 20 minutes before baking, even if the recipe doesn’t call for it,” Katie advocates. “The heat from your hands can make the butter melt and not stay in pea-sized pieces.” Janet also recommends freezing the cut scone dough before baking, especially if precisely shaped, uniform scones are desired. “It helps the dough to rise straight,” she says.
Make-Ahead Tip: Raw scones can be frozen completely on a baking sheet and then transferred to an airtight bag for longer storage, usually 3 months, says TeaTime’s editor, Lorna Reeves, who likes to keep a stash of unbaked scones in her freezer. “Just place the number of scones needed— whether one or more—on a parchment paper–lined rimmed baking sheet without thawing and bake according to recipe directions, allowing a little extra time for proper browning and doneness.” She says the scones have much better texture than if baked, frozen, and then re-heated.
Pretty Tops
Oftentimes, our scone recipes call for brushing the tops with cream or an egg wash and sprinkling with additional sugar or another garnish just prior to baking. “For a beautiful golden top, I like to use beaten egg rather than milk,” Jane notes. “Add a pinch of caster sugar and salt to the wash. Whisk hard then paint onto each scone with a pastry brush.”
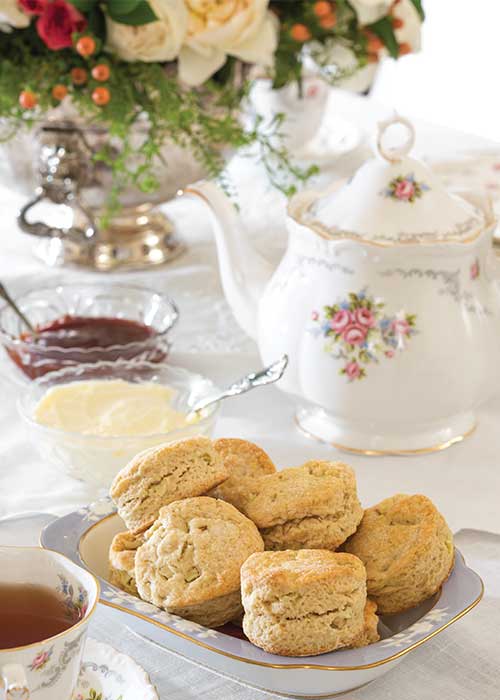
Sensational Serving
Whether you choose to serve your scones in British style, following the savories course, or in American fashion at the top of the meal, the consensus is that scones are best when served warm, if possible. In whichever desired serving order, chosen shape, and preferred flavor, it is undeniable that scones and tea are a dynamic duo. Both are quite lovely on their own, but together, tea and scones complement each other in such a way that elevates the beverage and the bake to a new level that cannot be achieved without the help of the other. For this reason, scones continue to be one of the most beloved hallmarks of afternoon tea and a highlight of each issue of TeaTime.

Editor’s Note: If you are a scone enthusiast, be sure to order our book, Teatime Scones.


My tip for baking a good scone is to make certain the butter is very cold when mixed into the batter. BTW, despite many venues showing a scone sliced in half with preserves and cream slathered across the top, the correct way to eat a scone is to break off one piece at a time from top to bottom. Then affix the preserves and cream to each bite. The same as one eats a dinner roll.
I’ve also been told to split the scone, put your cream and preserves on it but DO NOT put back together like a sandwich. If scones are small, and I like to make mine small, I do mine this way. If larger I break off a piece.
PS. The difThe slicing in half to be filled is what is done for a shortcake . A shortcake is not eaten with one’s hands. It’s eaten with a fork.
Agreed Ellen, this way our young diners are not tempted to eat it like a sandwich. Besides when cut in half it’s still going to have some crumbles. Breaking off a piece at a time ends up being much more manageable. Love a good scene with tea
*scone
Originally, Scones were small , the size of a biscuit no more than two inches round. The slicing of a scone in half with jam and cream began in hotels as a fast way to serve without having to place additional equipage on the table. It was a gimmick. And as often happens when one sees something in a marquee venue one assumes it’s correct even when it is not. Eat a sliced scone facing a mirror and one can see why it’s not correct. Just because something is popular doesn’t make it correct. Bon Apetit!
Most of the time I prefer the British style scones that are fluffy but not flaky. They require more kneading and rest time in between. The flaky “American” style ones are great for shortcake